17 Stunning Wall Art Ideas for Living Room That Transform Your Space
Wall art ideas for living room spaces don’t have to break the bank or require a fine arts degree. Honestly, some of the best living room wall decor comes from your own two hands, a little creativity, and maybe a hot glue gun (the crafter’s best friend, let’s be real).
Whether you’re looking for large wall art for living room walls that feel a bit empty or small accent pieces to complete your gallery wall living room vision, handmade touches add personality that store-bought stuff just can’t match.
Plus, there’s something genuinely satisfying about pointing to your wall and saying, “Yeah, I made that.” Ready to turn those blank walls into conversation starters? Let’s dive in.
Contents
- 1 Why Handmade Wall Art Hits Different
- 1.1 1. Macramé Wall Hanging with Boho Vibes
- 1.2 Achart Macrame Wall Hanging Large- Boho Wall Decor- large wall ar…
- 1.3 Artificial Eucalyptus Wall Decor Fake Greenery Leaves Stems Wall …
- 1.4 2. Abstract Canvas Art with Acrylic Pours
- 1.5 Nicpro Acrylic Pouring Kit, Artist Starter Supplies Including 19 …
- 1.6 Acrylic Paint Brush Set, 1 Packs / 10 pcs Watercolor Brushes Pain…
- 1.7 3. Pressed Botanical Frame Collection
- 1.8 upsimples Certificate Frame with High Definition Glass, 8.5 by 11…
- 1.9 Hongkee 8×10 Picture Frame Set of 4, Made of Real Glass and Distr…
- 1.10 upsimples 11×14 Picture Frame Set of 3, Made of High Definition G…
- 1.11 4. Geometric Wood Wall Art Sculpture
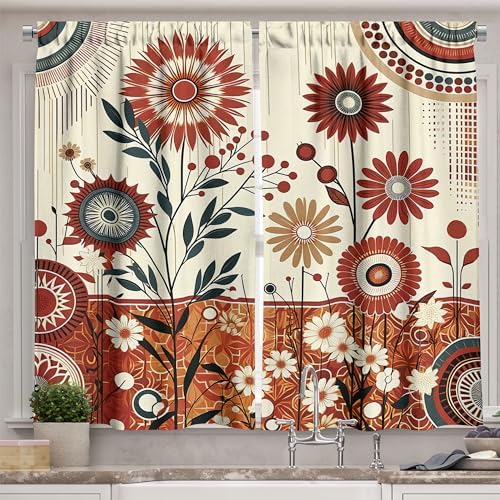
- 1.12 Ambesonne Floral Art Kitchen Curtains, Japanese Bohemian Concept …
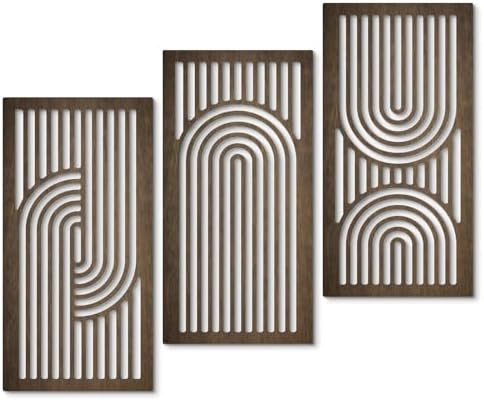
- 1.13 Putuo Decor Wooden Geometric Wall Art Set of 3, Modern Arched Wal…
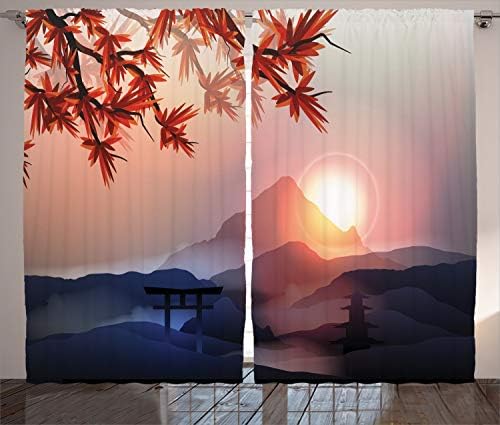
- 1.14 Ambesonne Asian Curtains, Majestic Himalayas Peaks Tops Silhouett…
- 1.15 5. Fabric Hoop Art with Bold Patterns
- 1.16 Caydo 12 Pieces 7 Inch Embroidery Hoops, Cross Stitch Hoops Embro…
- 1.17 Uphome 3 Pack Embroidery Starter Kit for Beginners Stamped Cross …
- 1.18 6. Gold Leaf Abstract Statement Piece
- 1.19 7. Yarn Wall Weaving with Color Blocking
- 1.20 Lion Brand Yarn BonBons Yarn Pack Brights
- 1.21 Retro-Glam Gold Metallic Yarn for Crocheting, 4-Pack (1280Yds / 4…
- 1.22 8. Shadow Box Display with Collections
- 1.23 8×8 Shadow Box Frame with Soft Linen Back – Easy Opening Memory D…
- 1.24 Americanflat 11×11 Shadow Box Frame with Shatter-Resistant Glass …
- 1.25 Freezing point Shadow Box Frame 5×12.5 Flower Shadow Box Pin Disp…
- 1.26 9. Paint Chip Mosaic Art
- 1.27 10. Minimalist Line Drawing Portraits
- 1.28 11. Vintage Book Page Collage
- 1.29 12. Dip-Dyed Canvas in Ombré Shades
- 1.30 13. Cork Board Landscape Wall Art
- 1.31 14. Washi Tape Geometric Mural
- 1.32 15. Embroidered Canvas with Botanical Motifs
- 1.33 16. Recycled Magazine Rolled Paper Art
- 1.34 17. Stenciled Quote Art with Modern Typography
- 2 Conclusion
- 3 FAQs
Why Handmade Wall Art Hits Different
Here’s the thing about DIY wall art for living room projects: they’re not just about saving money (though that’s a nice perk). Creating your own wall decor ideas for living room spaces means you control the colors, the vibe, and the story behind each piece.
A study from Drexel University found that just 45 minutes of creative activity can significantly reduce stress—so you’re basically self-care-ing while decorating. And unlike mass-produced prints, your handmade wall art is one-of-a-kind.
They say comparison is the thief of joy, but with DIY, there’s nothing to compare because it’s uniquely yours.
Fair warning: You might become that person who hoards cardboard, fabric scraps, and old frames “just in case.” No regrets.
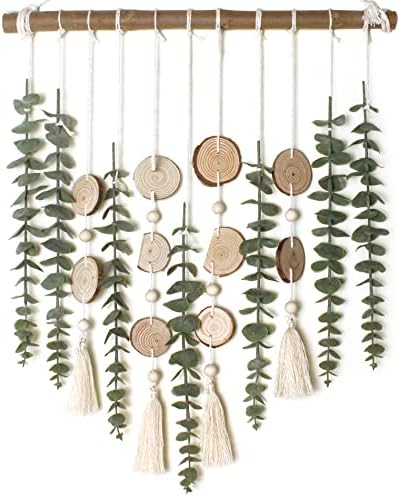
1. Macramé Wall Hanging with Boho Vibes
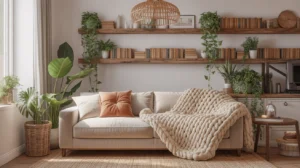
Transform cotton rope into a textured masterpiece that screams boho wall art sophistication. These woven wonders add instant warmth and work beautifully above couches or in cozy reading nooks. The knotted patterns create gorgeous shadows and dimension that flat art simply can’t achieve.
What You’ll Need:
- Cotton macramé cord (3mm or 5mm)
- Wooden dowel or branch
- Scissors
- Measuring tape
- Optional: wooden beads
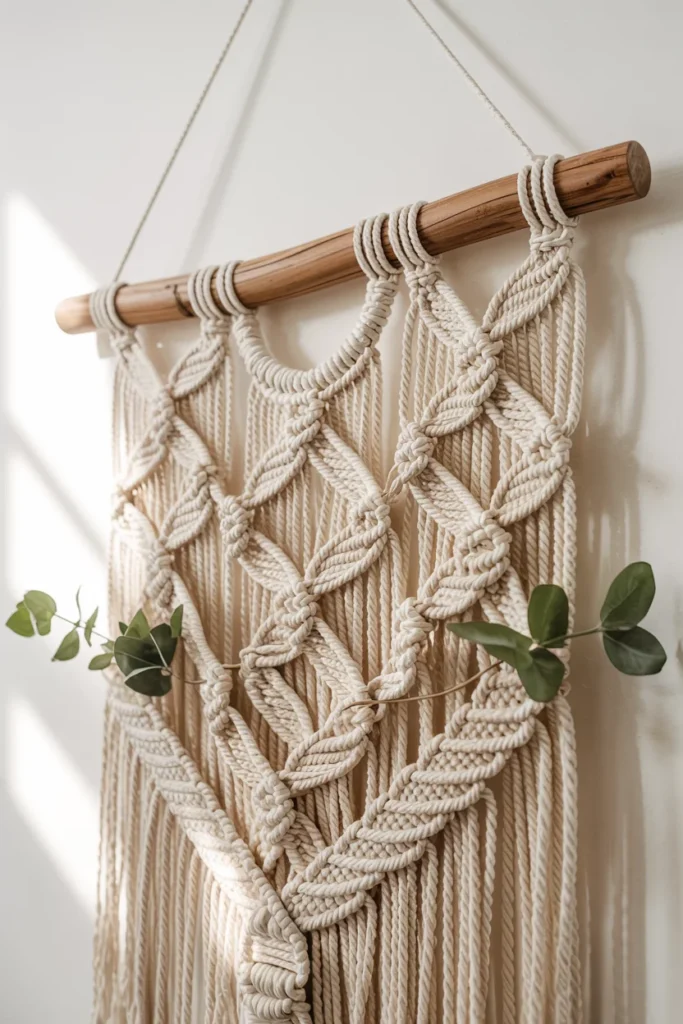
How to Make:
Start by cutting your cords to equal lengths (about 6-8 feet each). Fold each cord in half and attach to your dowel using a lark’s head knot. Practice basic square knots and half-hitch patterns, working your way down to create your design.
Trim the bottom into a V-shape or leave it wild and fringy. The whole process takes about 2-3 hours, but you’ll have something gorgeous.
🛒 Pro Tip: Amazon has beginner macramé cord sets that come with pre-cut lengths and pattern guides—total lifesaver for first-timers.
Time Needed: 2-3 hours
Difficulty: Moderate ⭐⭐
Eco Note: Use natural cotton rope that’s biodegradable and sustainable.

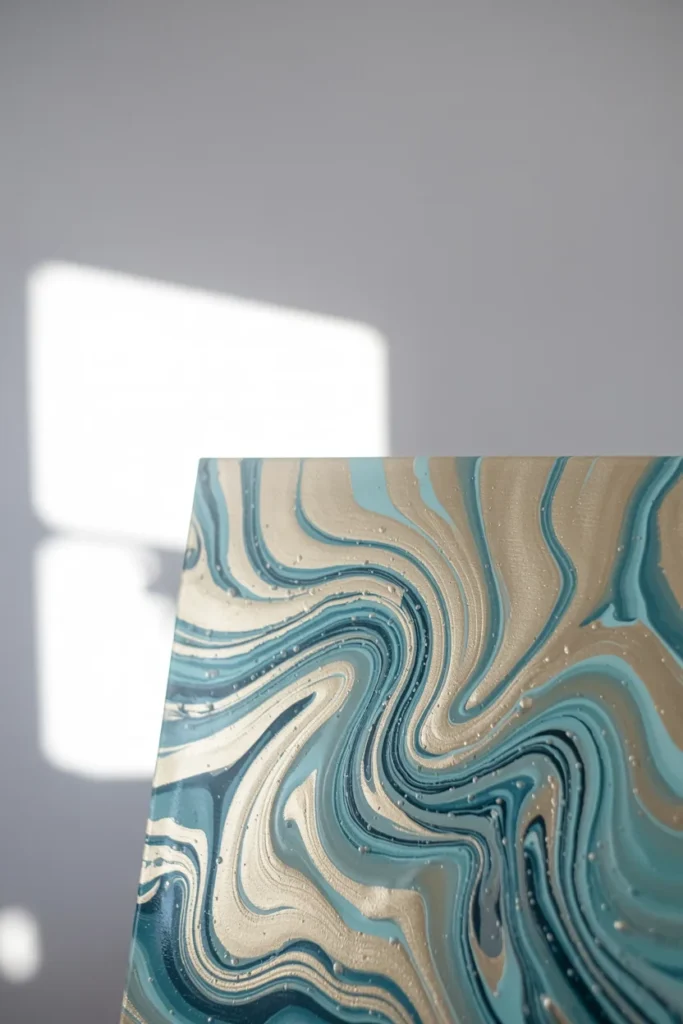
2. Abstract Canvas Art with Acrylic Pours
Channel your inner abstract artist with mesmerizing acrylic pour paintings. This abstract wall art for living room technique creates organic, fluid patterns that look expensive but cost practically nothing. Each piece turns out completely unique—like decorative fingerprints for your walls.
What You’ll Need:
- Blank canvas (16×20″ or larger)
- Acrylic paints in 3-5 colors
- Pouring medium
- Plastic cups
- Canvas leveler or cups to elevate
How to Make:
Mix each paint color with pouring medium (1:1 ratio). Layer colors into one cup, then flip onto your canvas center. Tilt the canvas slowly to spread the paint, creating organic patterns. Let it dry flat for 24-48 hours. The magic happens as colors blend and separate naturally.
🛒 Pro Tip: Grab an acrylic pouring kit on Amazon with pre-mixed mediums—it takes the guesswork out of ratios and gives you salon-worthy results.
Time Needed: 30 min active, 48 hours drying
Difficulty: Easy ⭐
Eco Note: Use leftover paint from other projects to reduce waste.


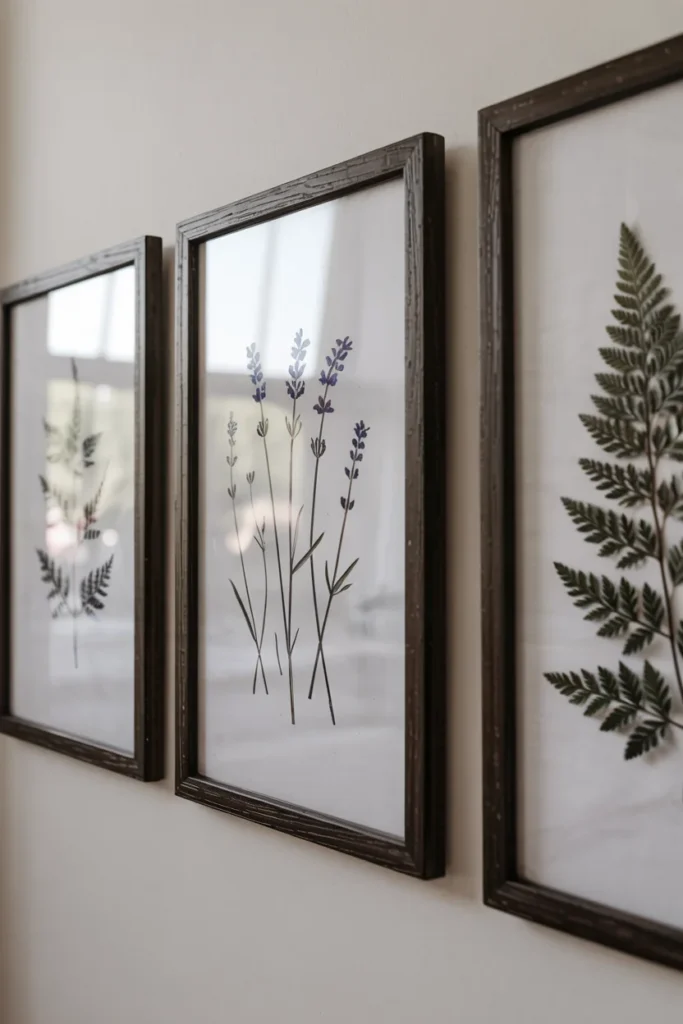
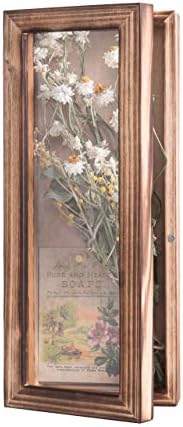
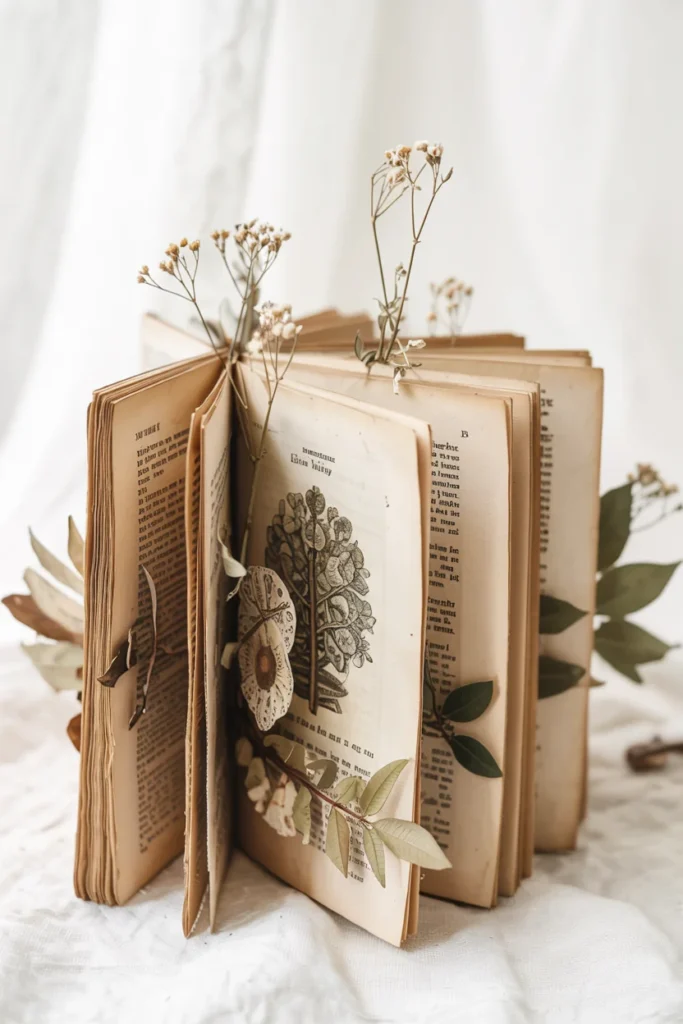
3. Pressed Botanical Frame Collection
Bring nature indoors with delicate pressed flowers and leaves arranged in simple frames. This neutral wall art approach works beautifully for farmhouse, minimalist, or cottagecore aesthetics. Plus, it’s the perfect excuse for a nature walk.
What You’ll Need:
- Fresh flowers and leaves
- Heavy books
- Parchment paper
- Simple frames with glass
- White cardstock
How to Make:
Place your botanicals between parchment paper sheets inside heavy books. Wait 2-3 weeks for complete drying. Once pressed, arrange them on white cardstock and secure with tiny dots of craft glue. Frame immediately to protect from moisture and fading.
🛒 Pro Tip: A flower press from Amazon speeds up the process to just one week and keeps petals perfectly flat.
Time Needed: 15 min active, 2-3 weeks pressing
Difficulty: Easy ⭐
Eco Note: Use fallen leaves and wildflowers for zero-impact collecting.


4. Geometric Wood Wall Art Sculpture
Create stunning 3D wall art using wood pieces in geometric patterns. These sculptural installations add architectural interest and work especially well for contemporary wall art lovers. The dimensional shadows change throughout the day as light shifts—basically living artwork.
What You’ll Need:
- Wood pieces (balsa, basswood, or reclaimed)
- Wood stain or paint
- Wood glue
- Sandpaper
- Backing board
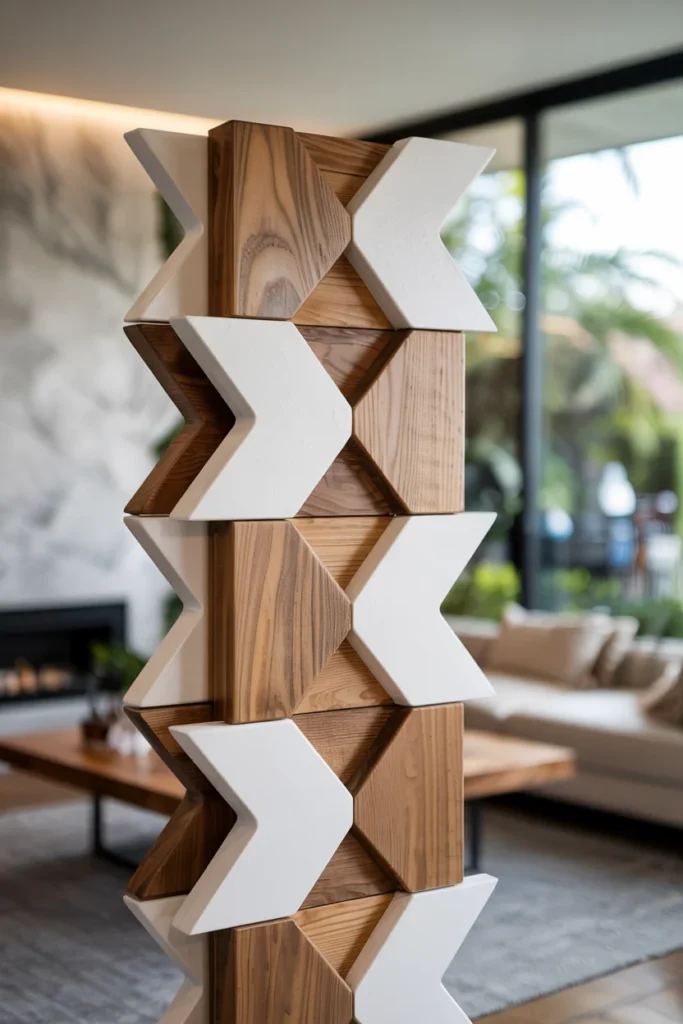
How to Make:
Cut wood into uniform triangles, hexagons, or rectangles. Sand edges smooth and stain or paint in coordinating shades. Arrange pieces on your backing board in a geometric pattern, playing with orientation until it feels balanced. Glue securely and let cure for 24 hours before hanging.
🛒 Pro Tip: Pre-cut wood shape sets on Amazon save tons of cutting time and come in perfect geometric forms ready to customize.
Time Needed: 3-4 hours
Difficulty: Moderate ⭐⭐
Eco Note: Use reclaimed wood from old pallets or fences for authentic rustic charm.
5. Fabric Hoop Art with Bold Patterns
Turn fabric scraps into textured wall decor using embroidery hoops. This technique lets you showcase gorgeous textiles—think vintage florals, modern geometrics, or global-inspired patterns. They’re lightweight, affordable, and ridiculously easy to swap out when you crave a new vibe.
If you’re exploring accent wall concepts, our living room accent wall ideas post shares creative backdrop options that pair perfectly with hoop art collections.
What You’ll Need:
- Embroidery hoops (various sizes)
- Fabric pieces with interesting patterns
- Scissors
- Hot glue gun
- Optional: ribbon for hanging
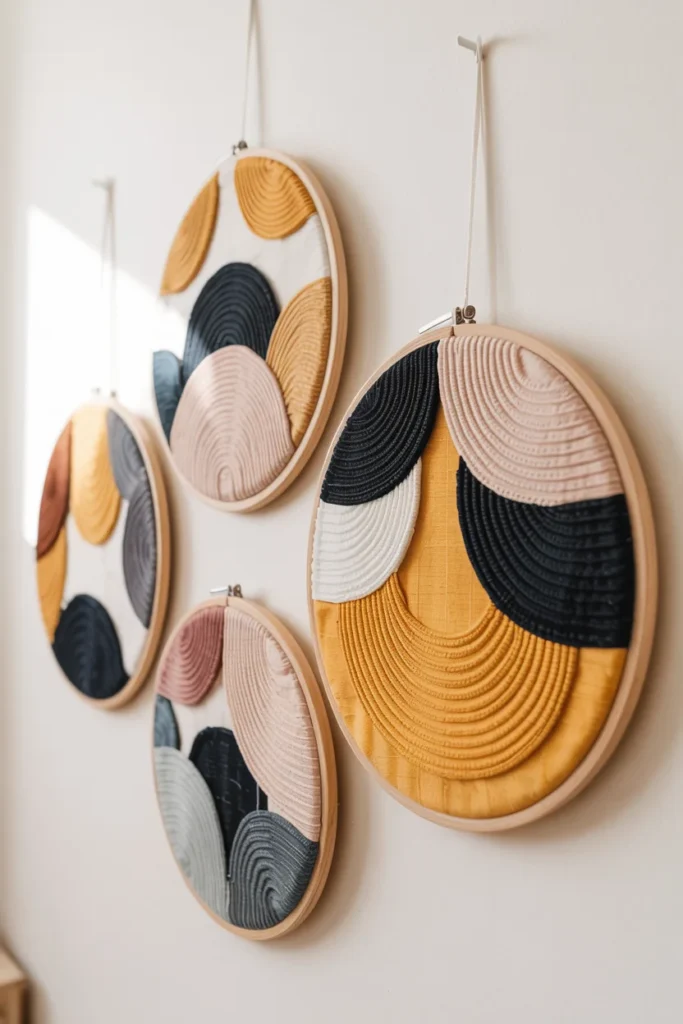
How to Make:
Place fabric in the hoop with pattern centered. Tighten the screw until fabric is drum-tight. Trim excess fabric leaving about 2 inches beyond the hoop. Fold the edge back and hot glue to the hoop’s inner ring. Hang as is or add a ribbon loop for a softer look.
🛒 Pro Tip: Bamboo embroidery hoop sets on Amazon come in graduated sizes perfect for creating an interesting gallery wall living room display.
Time Needed: 15 min per hoop
Difficulty: Easy ⭐
Eco Note: Upcycle fabric from old clothing, curtains, or thrift store finds.


6. Gold Leaf Abstract Statement Piece
Add a touch of luxury wall art for living room spaces with gold leaf accents on canvas. This technique looks incredibly high-end but requires minimal artistic skill—just a steady hand and a little patience. The metallic shimmer catches light beautifully and elevates any room instantly.
What You’ll Need:
- Canvas (24×36″ recommended)
- Acrylic paint (neutral base colors)
- Gold leaf sheets
- Adhesive sizing
- Soft brush
- Matte sealer
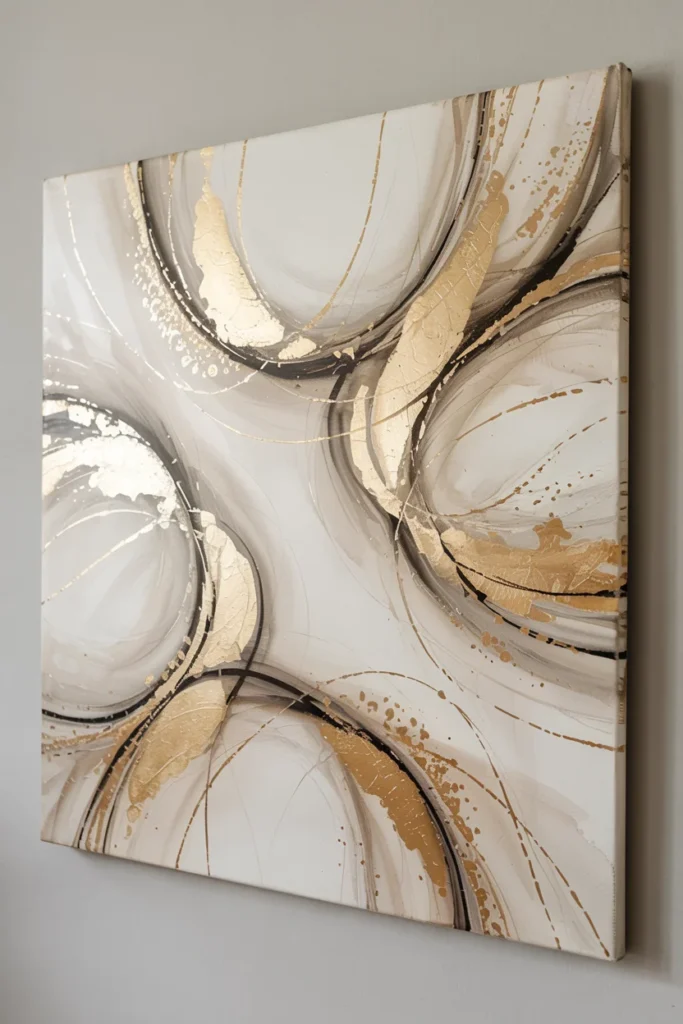
How to Make:
Paint your canvas in soft neutrals—think cream, gray, or blush. Once dry, apply sizing in abstract strokes or geometric shapes where you want gold.
Wait until sizing becomes tacky (about 20 minutes), then gently press gold leaf sheets onto the adhesive. Brush away excess with a soft brush. Seal with matte finish to protect the gold.
🛒 Pro Tip: Imitation gold leaf on Amazon costs a fraction of real gold but looks equally stunning—save your budget for more craft supplies.
Time Needed: 1 hour
Difficulty: Easy ⭐
Eco Note: Use imitation gold leaf which is more sustainable than mined precious metals.
7. Yarn Wall Weaving with Color Blocking
Create a cozy textured wall decor piece using colorful yarn in bold color-blocked sections. This fiber art technique adds warmth and visual interest while being surprisingly forgiving for beginners. The plush texture makes rooms feel instantly more inviting.
What You’ll Need:
- Wooden frame or loom
- Yarn in 3-5 coordinating colors
- Weaving needle
- Scissors
- Cardboard shuttle (optional)
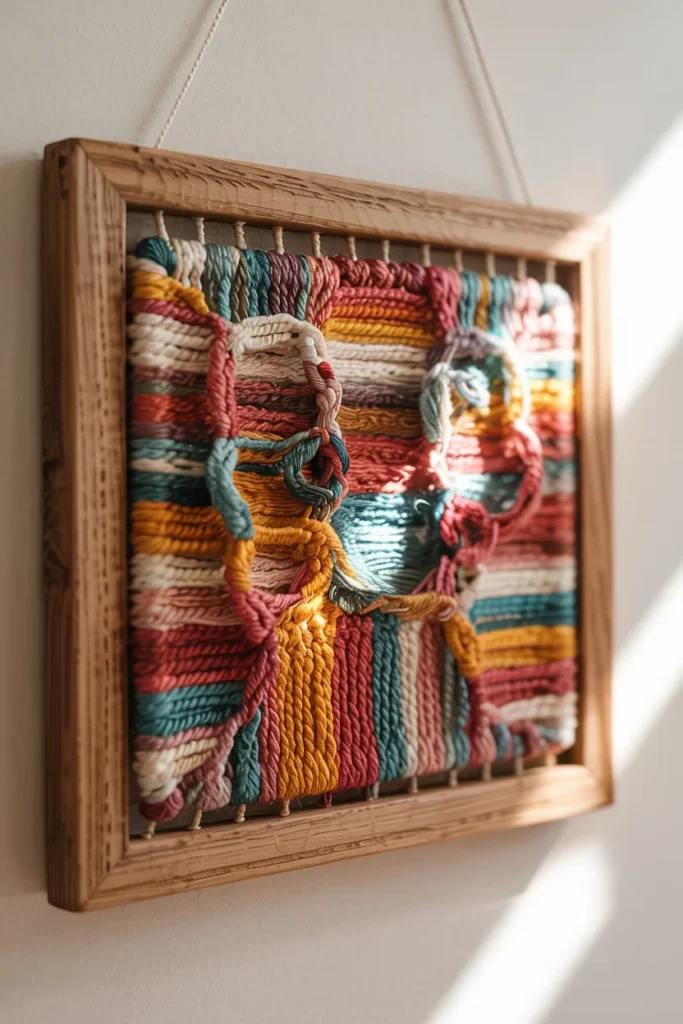
How to Make:
String your loom with neutral warp threads. Start weaving from the bottom with your first color, going over-under-over-under across the warp.
Pack each row tightly with a fork or comb. Switch colors to create horizontal blocks. Continue until the entire loom is filled, then carefully remove from the frame.
🛒 Pro Tip: Chunky acrylic yarn bundles on Amazon come in curated color palettes that take the guesswork out of coordination.
Time Needed: 4-6 hours
Difficulty: Moderate ⭐⭐
Eco Note: Use yarn scraps from other projects or unravel old sweaters for free materials.

8. Shadow Box Display with Collections
Turn meaningful objects into wall art sets for living room spaces using shallow shadow boxes. Display seashells, vintage buttons, pressed flowers, or small treasures that tell your story. It’s part art, part memory keeping, and completely personal.
What You’ll Need:
- Shadow box frames (various depths)
- Collection items (shells, postcards, tickets, etc.)
- Pins or adhesive
- Background paper or fabric
- Optional: labels or small cards
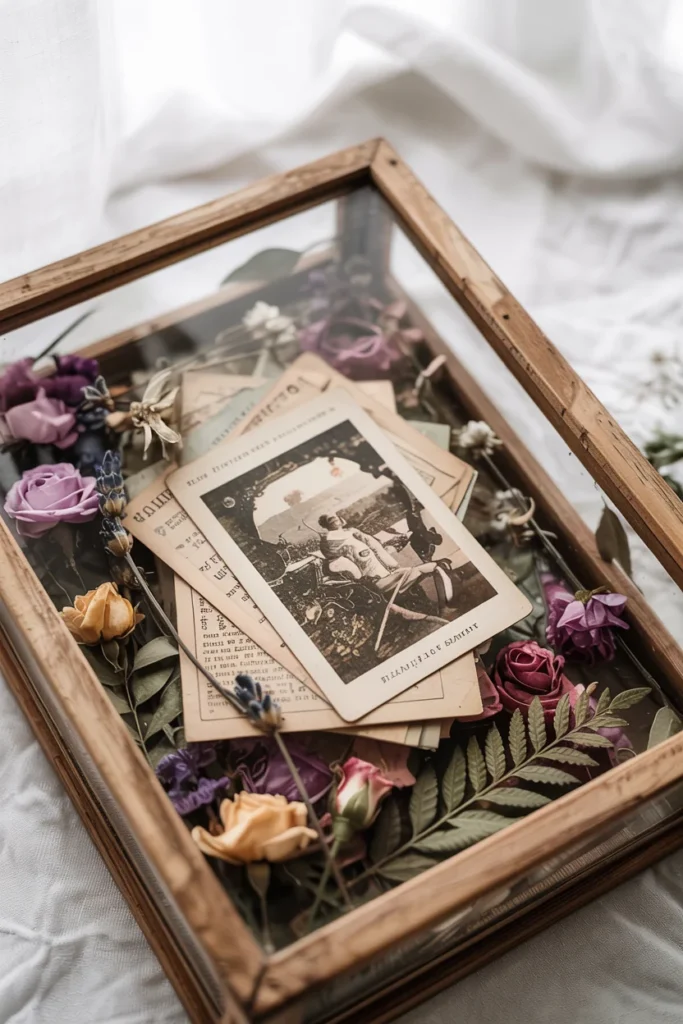
How to Make:
Choose a cohesive collection and arrange items on the background before committing. Play with spacing, orientation, and visual balance. Once happy with the layout, secure items using pins or museum putty for heavier objects. Frame and hang as individual pieces or create a gallery wall arrangement.
🛒 Pro Tip: Deep shadow box frames on Amazon (2-3 inches deep) accommodate thicker objects like coral, small plants, or dimensional items beautifully.
Time Needed: 30-45 min per box
Difficulty: Easy ⭐
Eco Note: Display natural found objects instead of purchasing new décor.


9. Paint Chip Mosaic Art
Upcycle free paint chips from hardware stores into surprisingly sophisticated affordable wall art ideas. The gradient possibilities are endless, and this project costs essentially nothing. Plus, it’s oddly meditative cutting and arranging those little rectangles into ombré masterpieces.
What You’ll Need:
- Paint chips in gradient colors
- Canvas or backing board
- Mod Podge or craft glue
- Scissors or paper cutter
- Foam brush
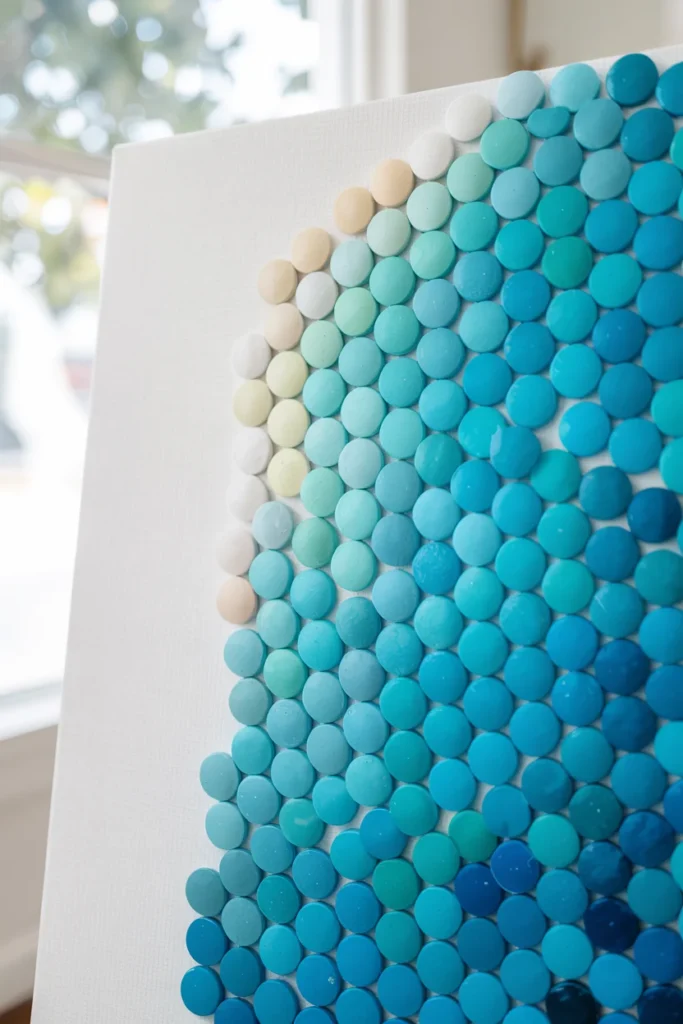
How to Make:
Collect paint chips in a color family you love. Cut into uniform squares, rectangles, or organic shapes. Arrange on your canvas to create an ombré effect, geometric pattern, or abstract design. Once satisfied, glue pieces down starting from one corner and working systematically. Seal with Mod Podge for durability.
🛒 Pro Tip: A precision paper trimmer from Amazon makes cutting hundreds of uniform pieces way less tedious and gives professional-looking results.
Time Needed: 2-3 hours
Difficulty: Easy ⭐
Eco Note: Uses materials that would otherwise be discarded—ultimate upcycling project.
10. Minimalist Line Drawing Portraits
Embrace minimalist wall decor with simple continuous line drawings. These single-line face or figure sketches look incredibly chic and modern. The beauty is in the imperfection—wobbly lines add character that perfectly straight ones can’t match.
What You’ll Need:
- White cardstock or watercolor paper
- Black fine-tip marker or paint pen
- Pencil for light sketching
- Simple frame
- Optional: reference photo
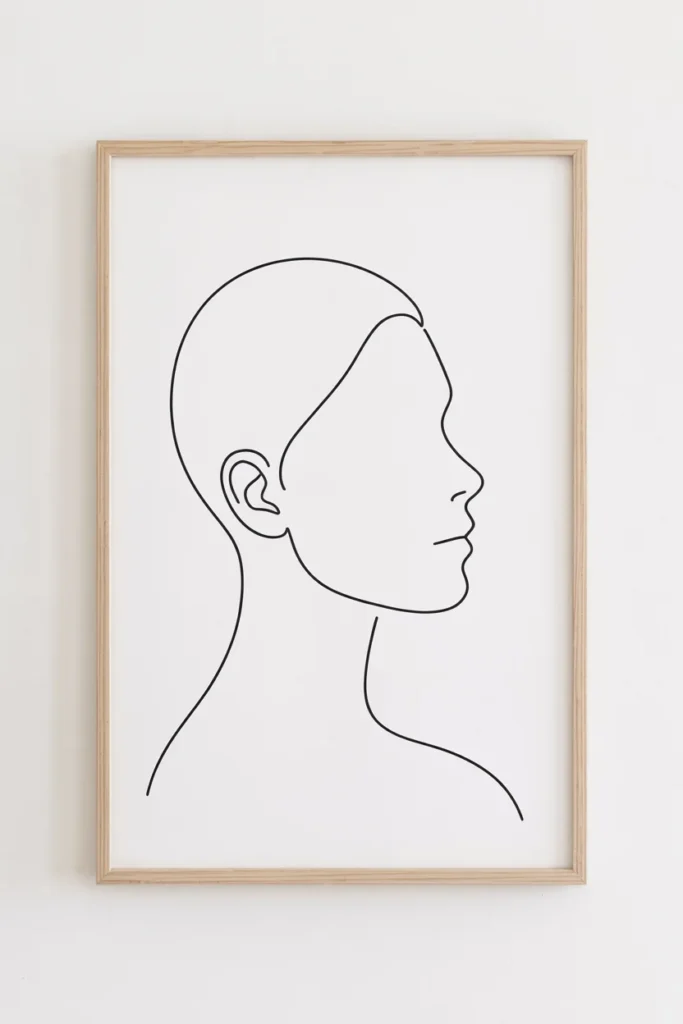
How to Make:
Lightly sketch your subject with pencil first if needed. Using one continuous line without lifting your marker, draw the outline of a face, figure, or object. The trick is to move slowly and deliberately. Frame immediately to prevent smudging. Create a series of 2-4 for maximum impact.
🛒 Pro Tip: Black archival ink pens on Amazon won’t fade or smudge over time—important for artwork you’re actually proud of.
Time Needed: 15-30 min per drawing
Difficulty: Moderate ⭐⭐
Eco Note: Use recycled paper or the back of old prints for practice pieces.
11. Vintage Book Page Collage
Create nostalgic wall art above couch living room spaces using pages from damaged vintage books. The aged paper adds instant character and works beautifully for farmhouse or cottage aesthetics. Literary lovers especially adore this one.
What You’ll Need:
- Vintage book pages or sheet music
- Canvas or heavy cardstock
- Mod Podge
- Foam brush
- Optional: coffee or tea for aging
How to Make:
Select pages with interesting fonts or illustrations. For extra aging, dip pages in cold coffee and let dry completely. Arrange pages on your canvas overlapping slightly. Brush Mod Podge underneath and on top of each page, smoothing out bubbles. Build up layers for depth. Seal entire piece with Mod Podge for a protective finish.
🛒 Pro Tip: Replica vintage ephemera packs on Amazon give you the aged look without damaging actual antique books.
Time Needed: 1-2 hours
Difficulty: Easy ⭐
Eco Note: Rescue damaged books from thrift stores that would otherwise be discarded.
12. Dip-Dyed Canvas in Ombré Shades
Master the art of wall art for living room modern spaces with dip-dyed canvases in graduated color. This technique creates soft, watercolor-like transitions that feel both organic and contemporary.
The results look way more complicated than the actual process. For more color inspiration beyond wall art, check out our dorm room color designs palette guide which explores coordinating hues perfect for cohesive room schemes.
What You’ll Need:
- Stretched canvas
- Fabric dye or diluted acrylic paint
- Large container for dyeing
- Water
- Clothespins or clips
- Drop cloth
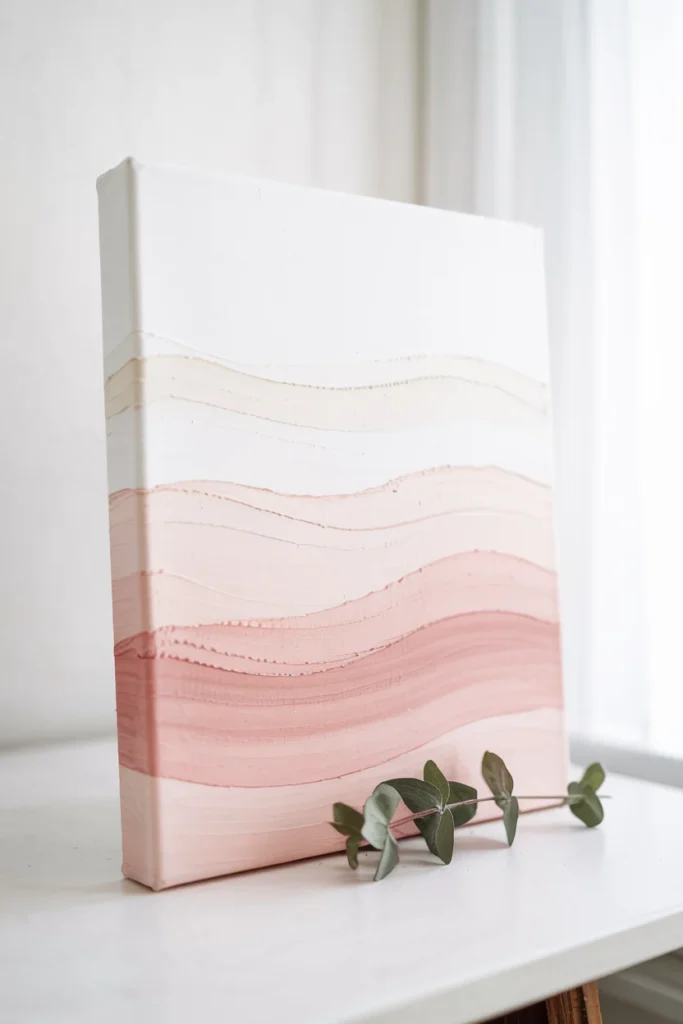
How to Make:
Mix your dye following package directions, creating 3-4 progressively lighter shades. Dip bottom edge of canvas into darkest shade for 10 seconds. Lift and dip slightly less deep into the next lighter shade. Continue with each shade, creating an ombré effect. Hang to dry using clips. The color bleeds naturally create beautiful transitions.
🛒 Pro Tip: Rit fabric dye on Amazon comes in amazing colors and creates professional-looking gradients that won’t fade quickly.
Time Needed: 45 min
Difficulty: Easy ⭐
Eco Note: Use natural fabric dyes from kitchen ingredients like turmeric, beets, or coffee.
13. Cork Board Landscape Wall Art
Transform humble cork tiles into textured wall decor with dimensional landscape silhouettes. The natural cork texture adds organic warmth while the layered design creates actual shadows and depth. It’s sculptural art that’s lightweight and budget-friendly.
What You’ll Need:
- Cork tiles or sheet
- Craft knife or scissors
- Pencil
- Acrylic paint (optional)
- Strong adhesive
- Backing board
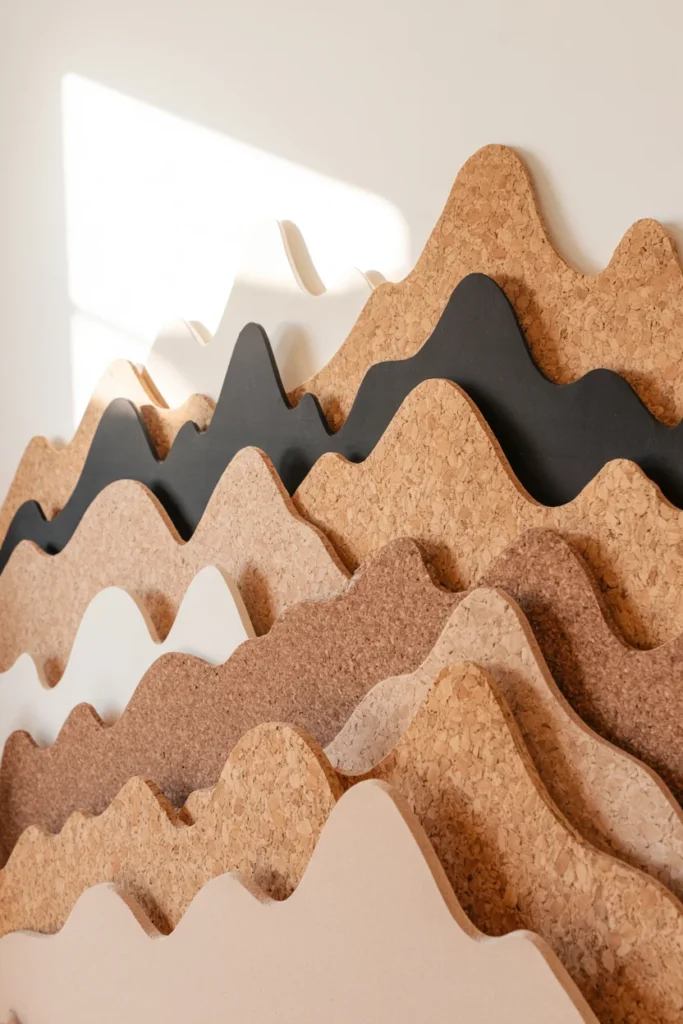
How to Make:
Draw simple mountain or cityscape silhouettes on cork. Cut out shapes with a craft knife on a cutting mat. Paint if desired, or leave natural. Layer shapes on your backing board with smallest/farthest layer first. Use adhesive foam squares between layers to create dimension. The final piece should have 3-4 depth levels.
🛒 Pro Tip: Self-adhesive cork sheets on Amazon make this project even easier—just peel and stick your layers.
Time Needed: 2 hours
Difficulty: Moderate ⭐⭐
Eco Note: Cork is a sustainable, renewable material harvested without harming trees.
14. Washi Tape Geometric Mural
Create removable wall art ideas for small living room spaces using colorful washi tape. This renter-friendly option lets you make bold geometric designs without permanent commitment. Change it up seasonally or whenever the mood strikes—no paint required.
What You’ll Need:
- Washi tape in 3-5 colors
- Level
- Measuring tape
- Pencil for light marks
- Scissors
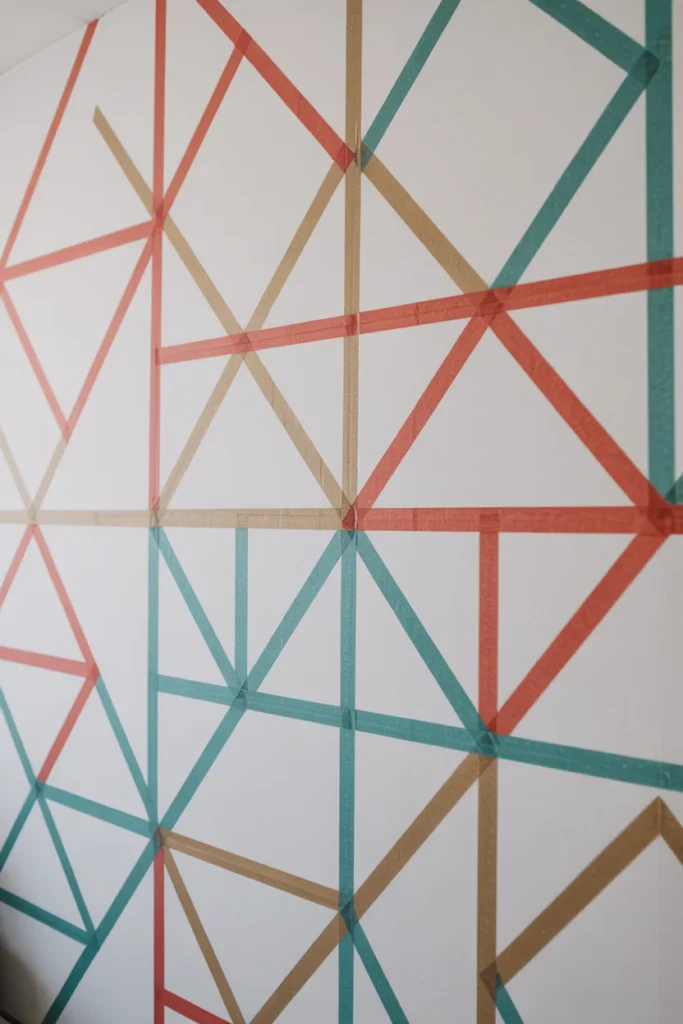
How to Make:
Plan your geometric design on paper first—think chevrons, triangles, hexagons, or abstract shapes. Lightly mark key points on your wall with pencil. Apply washi tape along your marks, using the level to keep lines straight. Overlap tape at corners for clean edges. Press firmly to avoid peeling.
🛒 Pro Tip: Metallic washi tape sets on Amazon add shimmer that looks especially chic in modern or glam spaces.
Time Needed: 1-2 hours
Difficulty: Easy ⭐
Eco Note: Washi tape is removable and reusable—perfect for renters.
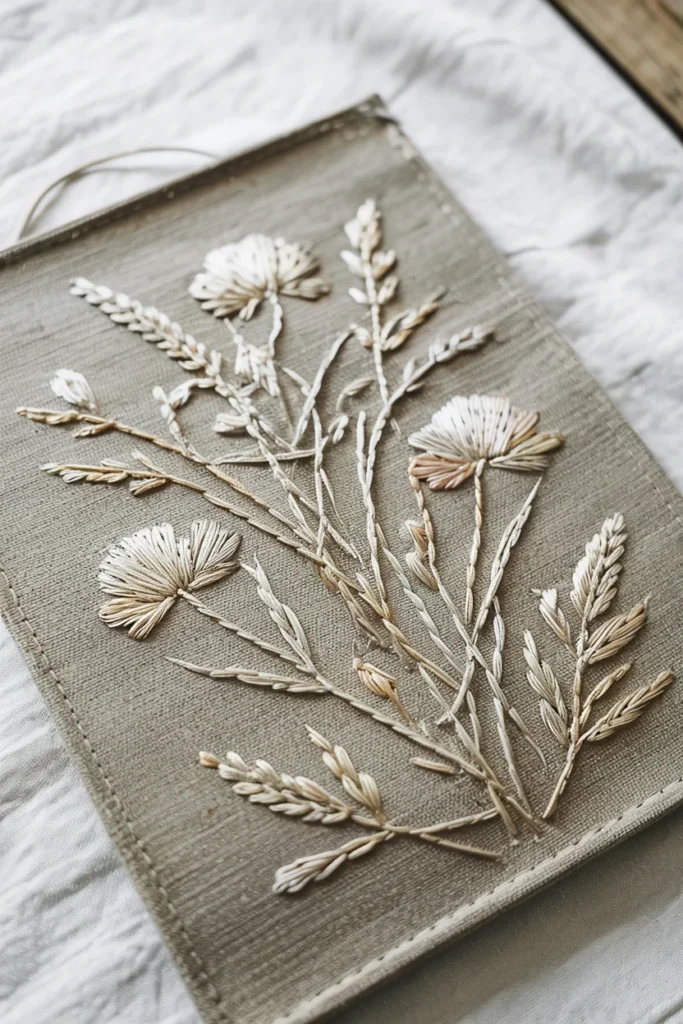
15. Embroidered Canvas with Botanical Motifs
Combine painting and embroidery for unique statement wall art that mixes mediums beautifully. The stitched elements add unexpected texture and visual interest that catches eyes from across the room. It’s Pinterest-perfect and conversation-starting.
What You’ll Need:
- Canvas board or stretched canvas
- Acrylic paints
- Embroidery floss
- Embroidery needle
- Pencil
- Thimble (optional)
How to Make:
Paint your canvas background in soft watercolor washes—think blush, sage, or sky blue. Once dry, lightly sketch botanical elements like leaves, flowers, or vines.
Using a large needle, embroider directly through the canvas following your sketch. French knots make perfect flower centers, while stem stitch creates delicate vines.
🛒 Pro Tip: Canvas boards on Amazon are pre-primed and easier to punch through than stretched canvas—your fingers will thank you.
Time Needed: 3-4 hours
Difficulty: Moderate ⭐⭐
Eco Note: Use leftover embroidery floss from other projects.
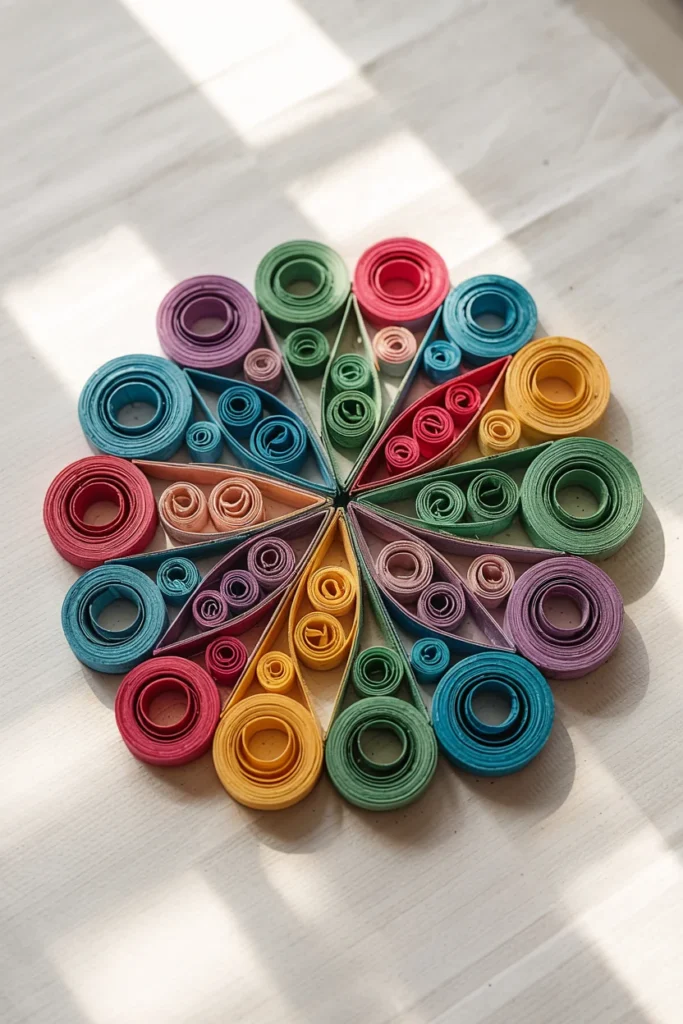
16. Recycled Magazine Rolled Paper Art
Turn glossy magazines into surprisingly elegant wall decor ideas for living room spaces with rolled paper quilling technique. The tight spirals create interesting texture and dimension while upcycling materials you’d normally toss. Plus, the color possibilities are literally endless.
If you’re working on seasonal updates, our Valentine’s Day decor ideas offers themed inspiration that pairs wonderfully with this customizable rolled paper technique.
What You’ll Need:
- Colorful magazine pages
- Quilling tool or toothpick
- White glue
- Canvas or backing board
- Scissors
- Tweezers
How to Make:
Cut magazine pages into long strips about 1/4 inch wide. Roll each strip tightly around a quilling tool or toothpick, then release slightly to desired size.
Glue the end and pinch into shapes like teardrops, leaves, or circles. Arrange coils on your canvas to create mandalas, flowers, or abstract patterns. Glue each piece firmly.
🛒 Pro Tip: A quilling tool kit on Amazon includes slotted tools and shaped templates that make rolling and shaping way faster.
Time Needed: 4-5 hours
Difficulty: Moderate ⭐⭐
Eco Note: Perfect upcycling project using materials headed for recycling bins.
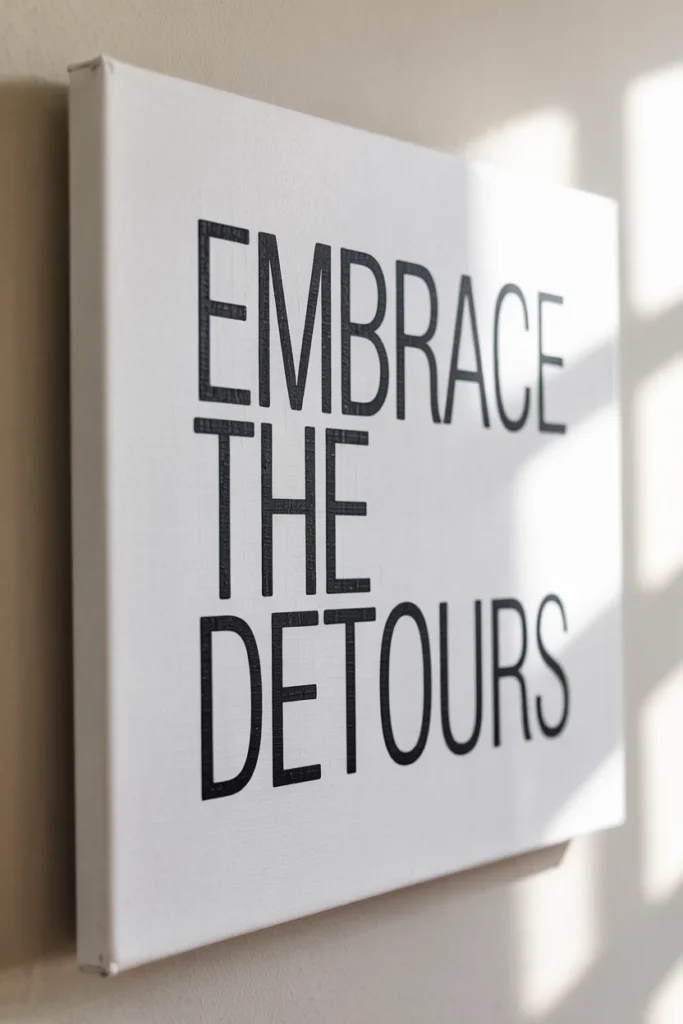
17. Stenciled Quote Art with Modern Typography
Finish strong with inspirational statement wall art featuring your favorite quotes in modern fonts. Clean typography never goes out of style, and personalizing with meaningful words makes it extra special. Choose quotes that actually resonate with you—not just what’s trendy on Instagram.
What You’ll Need:
- Canvas or wooden board
- Letter stencils or vinyl letters
- Acrylic paint
- Stencil brush or sponge
- Painter’s tape
- Optional: spray paint for quicker coverage
How to Make:
Paint your background color and let dry completely. Position stencils carefully using painter’s tape to secure. Dab paint through stencils using an up-and-down motion (never brush sideways or paint bleeds).
Remove stencils while paint is still slightly wet for crisp edges. Touch up any bleeds with background color once everything dries.
🛒 Pro Tip: Reusable letter stencil sets on Amazon come in multiple font styles and sizes—buy once, use for dozens of projects.
Time Needed: 1 hour
Difficulty: Easy ⭐
Eco Note: Use reclaimed wood as your canvas for rustic charm.
Conclusion
Your walls are basically blank canvases waiting for your creative magic—and now you’ve got 17 gorgeous wall art ideas for living room transformations to choose from.
Whether you’re feeling the boho macramé vibes, craving some abstract paint pouring therapy, or ready to upcycle magazines into art, there’s something here for every style and skill level.
The best part? Each piece tells your story because you made it with your own hands. So grab that glue gun, pick your favorite project, and get creating. Your living room is about to get way more interesting. And hey, when friends ask where you got that amazing art, just smile and say, “I made it.” ✨
FAQs
What are easy DIY wall art ideas for beginners?
Start with paint chip mosaics, fabric hoop art, or washi tape geometric designs—they require minimal supplies and artistic skill while delivering impressive results perfect for affordable wall art ideas.
How can I make large wall art for living room on a budget?
Create oversized abstract canvases using acrylic pour technique, dip-dyed ombré pieces, or geometric wood sculptures using reclaimed materials—all cost under $30 but look expensive.
What’s the best placement for wall art above a couch?
Center your wall art above couch living room arrangement about 6-8 inches above the furniture, ensuring the piece is roughly two-thirds the width of your couch for balanced proportions.
How do I arrange a gallery wall living room display?
Lay out your arrangement on the floor first, mixing frame sizes and orientations while keeping 2-3 inches between pieces for a cohesive gallery wall living room that feels curated, not cluttered.
Can I create statement wall art without painting skills?
Absolutely—try macramé wall hangings, pressed botanical frames, shadow box collections, or magazine rolled paper art for stunning statement wall art that requires zero painting ability.